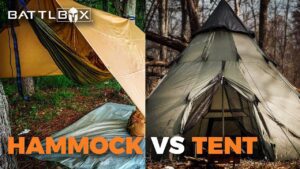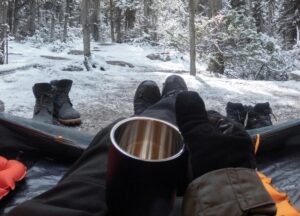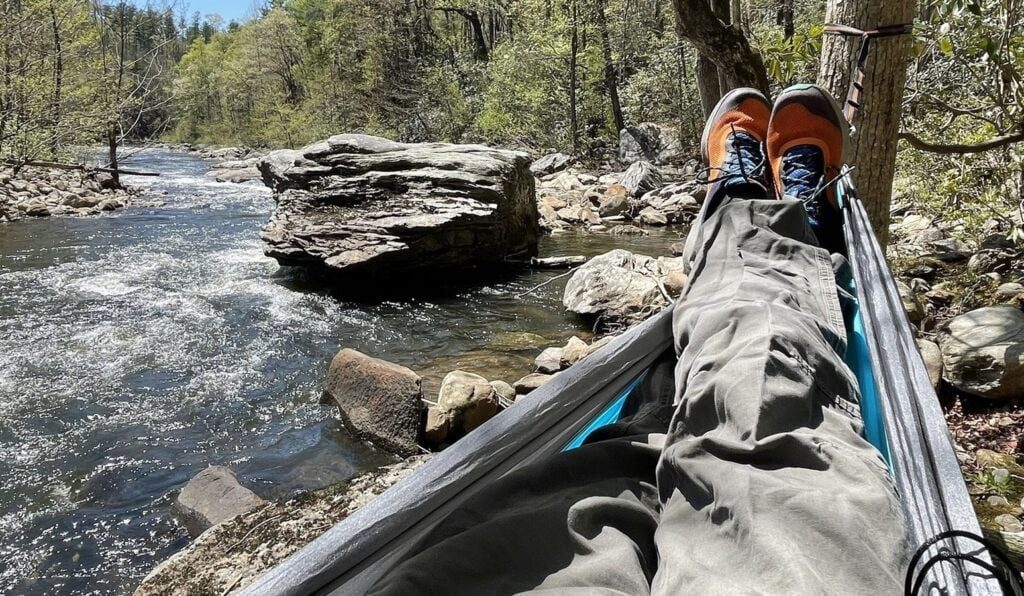
Hammock camping has exploded in popularity over the last decade, and for good reason. Hanging above the ground in a lightweight nylon cocoon can provide a superior night’s sleep compared to tossing and turning on rocky, sloping terrain. However, making the switch from traditional ground shelters requires learning a whole new set of skills and gear.
In this comprehensive guide, we’ll cover everything you need to know before investing in a hammock system. I’ll share tips from my personal experience testing gear and spending over 50 nights sleeping under a tarp. By the end, you’ll understand the pros and cons and have all the information you need to decide if hammock camping is right for you.
Hammock Camping Benefits
First, let’s quickly recap some of the main advantages of hammock camping:
More Comfortable Sleep
Hammocks contour to your body shape and relieve pressure points better than sleeping pads. The continuous bed surface also minimizes tossing, turning, and rebundled insulation.
Avoid Rocky, Bumpy Terrain
With a hammock, you don’t have to worry about finding a perfectly flat spot. Tree straps protect bark better than tent stakes do to the ground.
Stay Dryer
By elevating off wet, cold earth you reduce conductive heat loss. Hammocks also provide better airflow and ventilation.
Lighter Pack Weights
Hammock systems can be customized to trim base weights under 10 pounds, perfect for ultralight enthusiasts.
Fun and Versatile
Hammocks double as swings and camp chairs. They’re great for reading, relaxing, and enjoying the outdoors in comfort.
Low Impact Camping
With thoughtful Leave No Trace practices, hammocking has less impact on the environment than tent camping.
Modular and Adaptable
You can mix and match components like underquilts for optimal performance in 3-season conditions. Some hammocks even work in winter!
Factors to Consider Before Buying a Hammock
Hammock camping involves a learning curve. Assess these factors honestly before investing in new gear:
Sleep Style and Comfort
Hammocks work best for back sleepers. Stomach and side sleepers may find it difficult to get fully flat. Test out a friend’s hammock first if possible.
Camping Locations and Terrain
Trees are essential for hanging hammocks reliably. They’re ideal in forested areas like the Appalachians but may not work above treeline or in sparse desert canyons.
Budget
Quality hammock systems have upfront costs comparable to UL tents. But you can also DIY a setup relatively cheaply to test it out.
Weight Comparisons
Aim for total weight under 2 pounds for hammock, tarp, suspension, and insulation. Lighter options exist but may sacrifice durability.
Weather Conditions
Hammocks and tarps require good site selection and orientation in high winds and precipitation. Skill comes with experience.
Learning Curve
Expect a transition period getting comfortable with hangs, new gear, and dialing in your sleep system. Allow extra setup time starting out.
Choosing a Hammock
The hammock itself is the foundation of your shelter system. Consider these factors when choosing one:
Weight and Packed Size
Look for “ultralight” hammocks under 1 pound made with lightweight nylon or dyneema composite fabrics. Ripstop nylon is more affordable for first-timers.
Integrated Bug Netting
Some hammocks come with bug nets pre-attached. These are convenient but add weight. Separate nettings save ounces.
Dimensions and Features
For sleeping, look for at least 10 ft. long and 4-5 ft. wide. Wider improves comfort for side sleepers. Double layers allow you to insert sleeping pads.
Durability and Quality
Check reviews carefully and buy from reputable cottage companies like Dutchware, Warbonnet, and Hammock Gear.
Price
Expect to spend $100-$300 for a quality full-feature hammock. You can also make your own fairly easily for cheaper.
I’d recommend starting with an affordable ENO SubLink Shelter System or the Warbonnet Blackbird. Both include suspension and basic tarp for under $300 total.
Choosing a Tarp
Your tarp provides critical weather protection and determines how spacious your shelter will feel. Consider these factors when selecting one:
Shapes
Asymmetrical and hexagon tarps maximize coverage for their weight. Rectangular tarps are roomier but heavier.
Size
For solo camping, 10 x 10 ft. to 12 x 12 ft. tarps are recommended depending on weather conditions. Bigger tarps give more living space.
Doors
Some winter tarps have zippered doors at the ends to seal off the interior. This adds versatility in cold weather.
Ridgelines
Structural ridgelines make tarps quicker to pitch and increase stability in stormy weather. They can be DIY or pre-installed.
Materials
Look for 20D silicone-coated nylon or Cuban fiber tarps that are naturally waterproof and durable. DCF is the lightest but expensive option.
Quality budget tarps can be found at Paria Outdoor Products and Yukon Outfitters. For ultralight tarps, check out Zpacks, Hyperlite Mountain Gear, and Hammock Gear.
I suggest starting with a 10 x 10 ft. hex tarp. The Warbonnet Mamajamba is a great mid-range option with lots of customizable features.
Choosing Suspension Parts
Suspending your hammock properly is key for comfort and safety. Here are the main components you’ll need:
Tree Straps
Tree straps with daisy chains protect bark and give you flexibility for getting perfect hangs. Get straps rated for 400+ lbs.
Carabiners
Lightweight carabiners allow quick and easy connection to tree straps. Get ones rated for climbing/mountaineering rather than cheaper barrel locks.
Ridgeline
Add an adjustable ridgeline to dial in the perfect sag and lie flat. You can buy or DIY them easily.
Tensioners
Optional line tensioners like whoopie slings help get tighter hangs and reduce sagging overnight. Great for dialing in your hang angle.
Quality and affordable suspension supplies can be purchased from Dutchware, Warbonnet, and Hammock Gear.
Staying Warm with Underquilts and Insulation
Underquilts are just as critical to comfort as your sleeping bag on the ground. Stay warm by understanding their key properties and features:
Temperature Rating
Get an underquilt rated for the coldest nighttime lows you plan to camp in. Most work down to freezing or just below. You can layer quilts for colder weather.
Down vs. Synthetic Insulation
Down packs lighter and more efficiently but loses loft when wet. Synthetic insulation is cheaper and retains some warmth when wet.
Attachment Methods
Quality underquilts have shock cords and multiple attachment points to keep them snuggly in place beneath you all night.
Overlap with Topquilt
For maximum efficiency, make sure your underquilt overlaps a few inches with the lower part of your top quilt or sleeping bag. This seals the warm pocket around you.
Budget Option: CCF Pad
You can use a closed cell foam sleeping pad in a hammock instead of an underquilt to save money. But they’re bulkier and don’t wrap as snuggly.
Once again, Hammock Gear, Warbonnet, and Enlightened Equipment make top-notch underquilts from economical synthetic options to premium goose down. The Hammock Gear Econ Burrow is a nice entry-level choice.
Mastering the Art of the Hang
One of the trickiest skills when starting out is getting a good hang dialed in. Here are some tips:
Ideal Hang Angle
Aim for 30 degrees off flat to lay diagonally. This allows your torso and knees to flatten out. Use a hanging calculator to estimate ideal strap lengths.
Hang it Tight
Eliminate sag by getting those suspension lines tight! Don’t be afraid to really crank down – the tree straps spread out the force.
Mind the Ridge Line
Clip your ridge line into the carabiners first, then attach the hammock. Helps get consistent sag.
Site Selection
Pick trees about 18 to 22 ft. apart (less for a gathered end hammock). Avoid dead trees or branches overhead.
Tree Protection
Always use wide tree straps and position them carefully to avoid damaging bark and roots. Carry a small shovel to flatten surface roots if needed.
Practice Makes Perfect
It takes most people a few tries to consistently get that “perfect hang.” Don’t get discouraged! The more you practice, the faster setup becomes.
With some experience under your belt, you’ll be able to spot ideal trees from a distance and confidently hang in just a couple minutes.
Hammock Camping Tips and Tricks
Here are some additional pointers to make your hammock camping adventures more enjoyable:
- Use a sleeping pad inside your hammock on warmer nights. Doubles as insulation if temperatures drop.
- Camp near water sources to refill easily without exiting your hammock.
- Cinch cord pulls and ridge line storage pockets keep small items from falling or blowing away at night.
- Hang your backpack on your ridgeline to keep food away from critters. No need to pack a bear canister!
- Buy a double-layered hammock to slot in a closed cell foam pad. Adds warmth for winter trips.
- Wrap up in your quilt like a burrito instead of splaying flat. Keeps you warmer by reducing surface area.
- Use hiking poles or specialized spreader bars to keep bug nets and tarps taught when pitched.
- Add small strips of reflective insulation inside your tarp ridgeline tie-outs to re-direct rising heat back under the tarp.
Key Takeaways: Is Hammock Camping Right For You?
Hammock camping isn’t for everyone, but it provides a new dimension of freedom and comfort for those willing to learn. If the following describes you, then hammocks could be an excellent addition to your quiver of shelter systems:
- Primarily hike and camp in forested areas with available trees
- Find rocky, sloping, or wet terrain uncomfortable for sleeping
- Seek flexibility in campsite selection and leaving no trace
- Appreciate modular, customizable systems
- Willing to practice skills like hangs and site selection
- Already backpack with fairly lightweight gear
As with any major gear switch, carefully assess if a hammock aligns with your hiking style, preferred terrain, and budget. Test rides are highly recommended before taking the plunge on a whole new system. But for those who enjoy an occasional escape off the hard ground and into the trees, hammocks offer an incredibly peaceful night’s sleep!
Let me know if you have any other hammock camping questions. I’m happy to share more insights from my own experience getting started. Here are some great online resources to continue researching:
Happy (comfortable) hanging!
